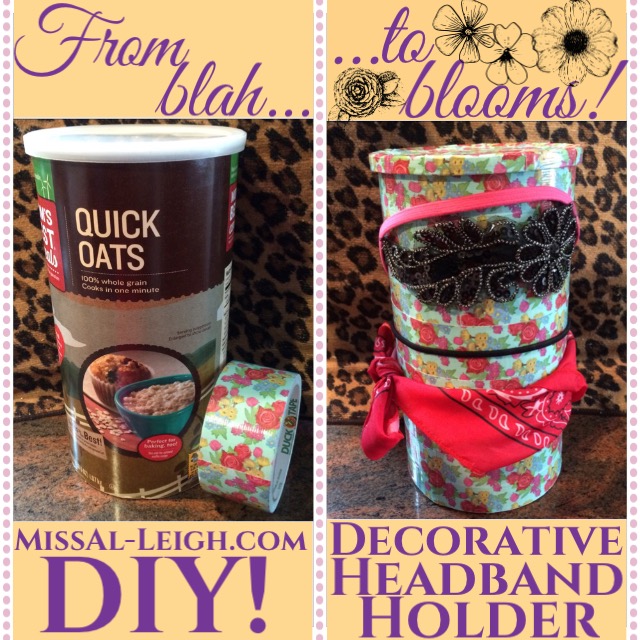
DIY Decorative Headband Holder
Hey y’all!
Today I’m doing a DIY Tutorial that will show you how to turn an Oatmeal container into a Decorative Headband Holder! This is a really super simple version of those more complicated tutorials you may have seen on Pinterest. My tutorial doesn’t require fabric, card stock, or any kind of glue. All you need is an empty, cleaned out 38 oz container of Oatmeal (or smaller if you’re crafting for a child), scissors, & duct tape in your preferred pattern/print/color!
This project is great for beginning DIYers, busy bees who don’t have a lot of time, those working with limited crafting space or crafting on a budget! As this is a pretty easy and safe craft – be careful with the scissors! – I think this would be a good project to do with crafty kiddos. I can see myself taking my little cousins on a trip to a craft store to pick out their favorite tape & spending some time crafting.
My basic Tutorial is very simple & allows for a lot of trial & error. If you make a mistake, rip the tape off and try again! If your container gets bent out of shape, take the lid off & pop out the dent! However, if you’re looking for something more, I’ve included some tips and tricks throughout that will help you spice this DIY up a bit! Let’s get Crafting!

Start wrapping the tape around horizontally, wrapping as you go. Cut the ends instead of tearing for a cleaner look.
Start by cleaning your Oatmeal container. I put the oats in a large Tupperware & dusted out any debris. I chose to start my tape alongside the seam of the container. Working in horizontal sections, wrap the tape around, as pictured. I worked one section at a time, pulling the tape as I wrapped rather than measuring or estimating how long each piece needed to be, but it’s up to you. I chose to overlap the pieces sometimes or start the sections in other areas to make the flowers match up so I didn’t create a uniform seam going vertically down. You can choose to line the tape up perfectly, but I don’t think that’s necessary because, really, who is looking that closely!? Most of your headbands will cover up the tape lines. If you’re using a less busy pattern, like maybe a chevron print, it would probably be more beneficial to match everything more closely as it will be more obvious if your rows disturb the pattern.
The base
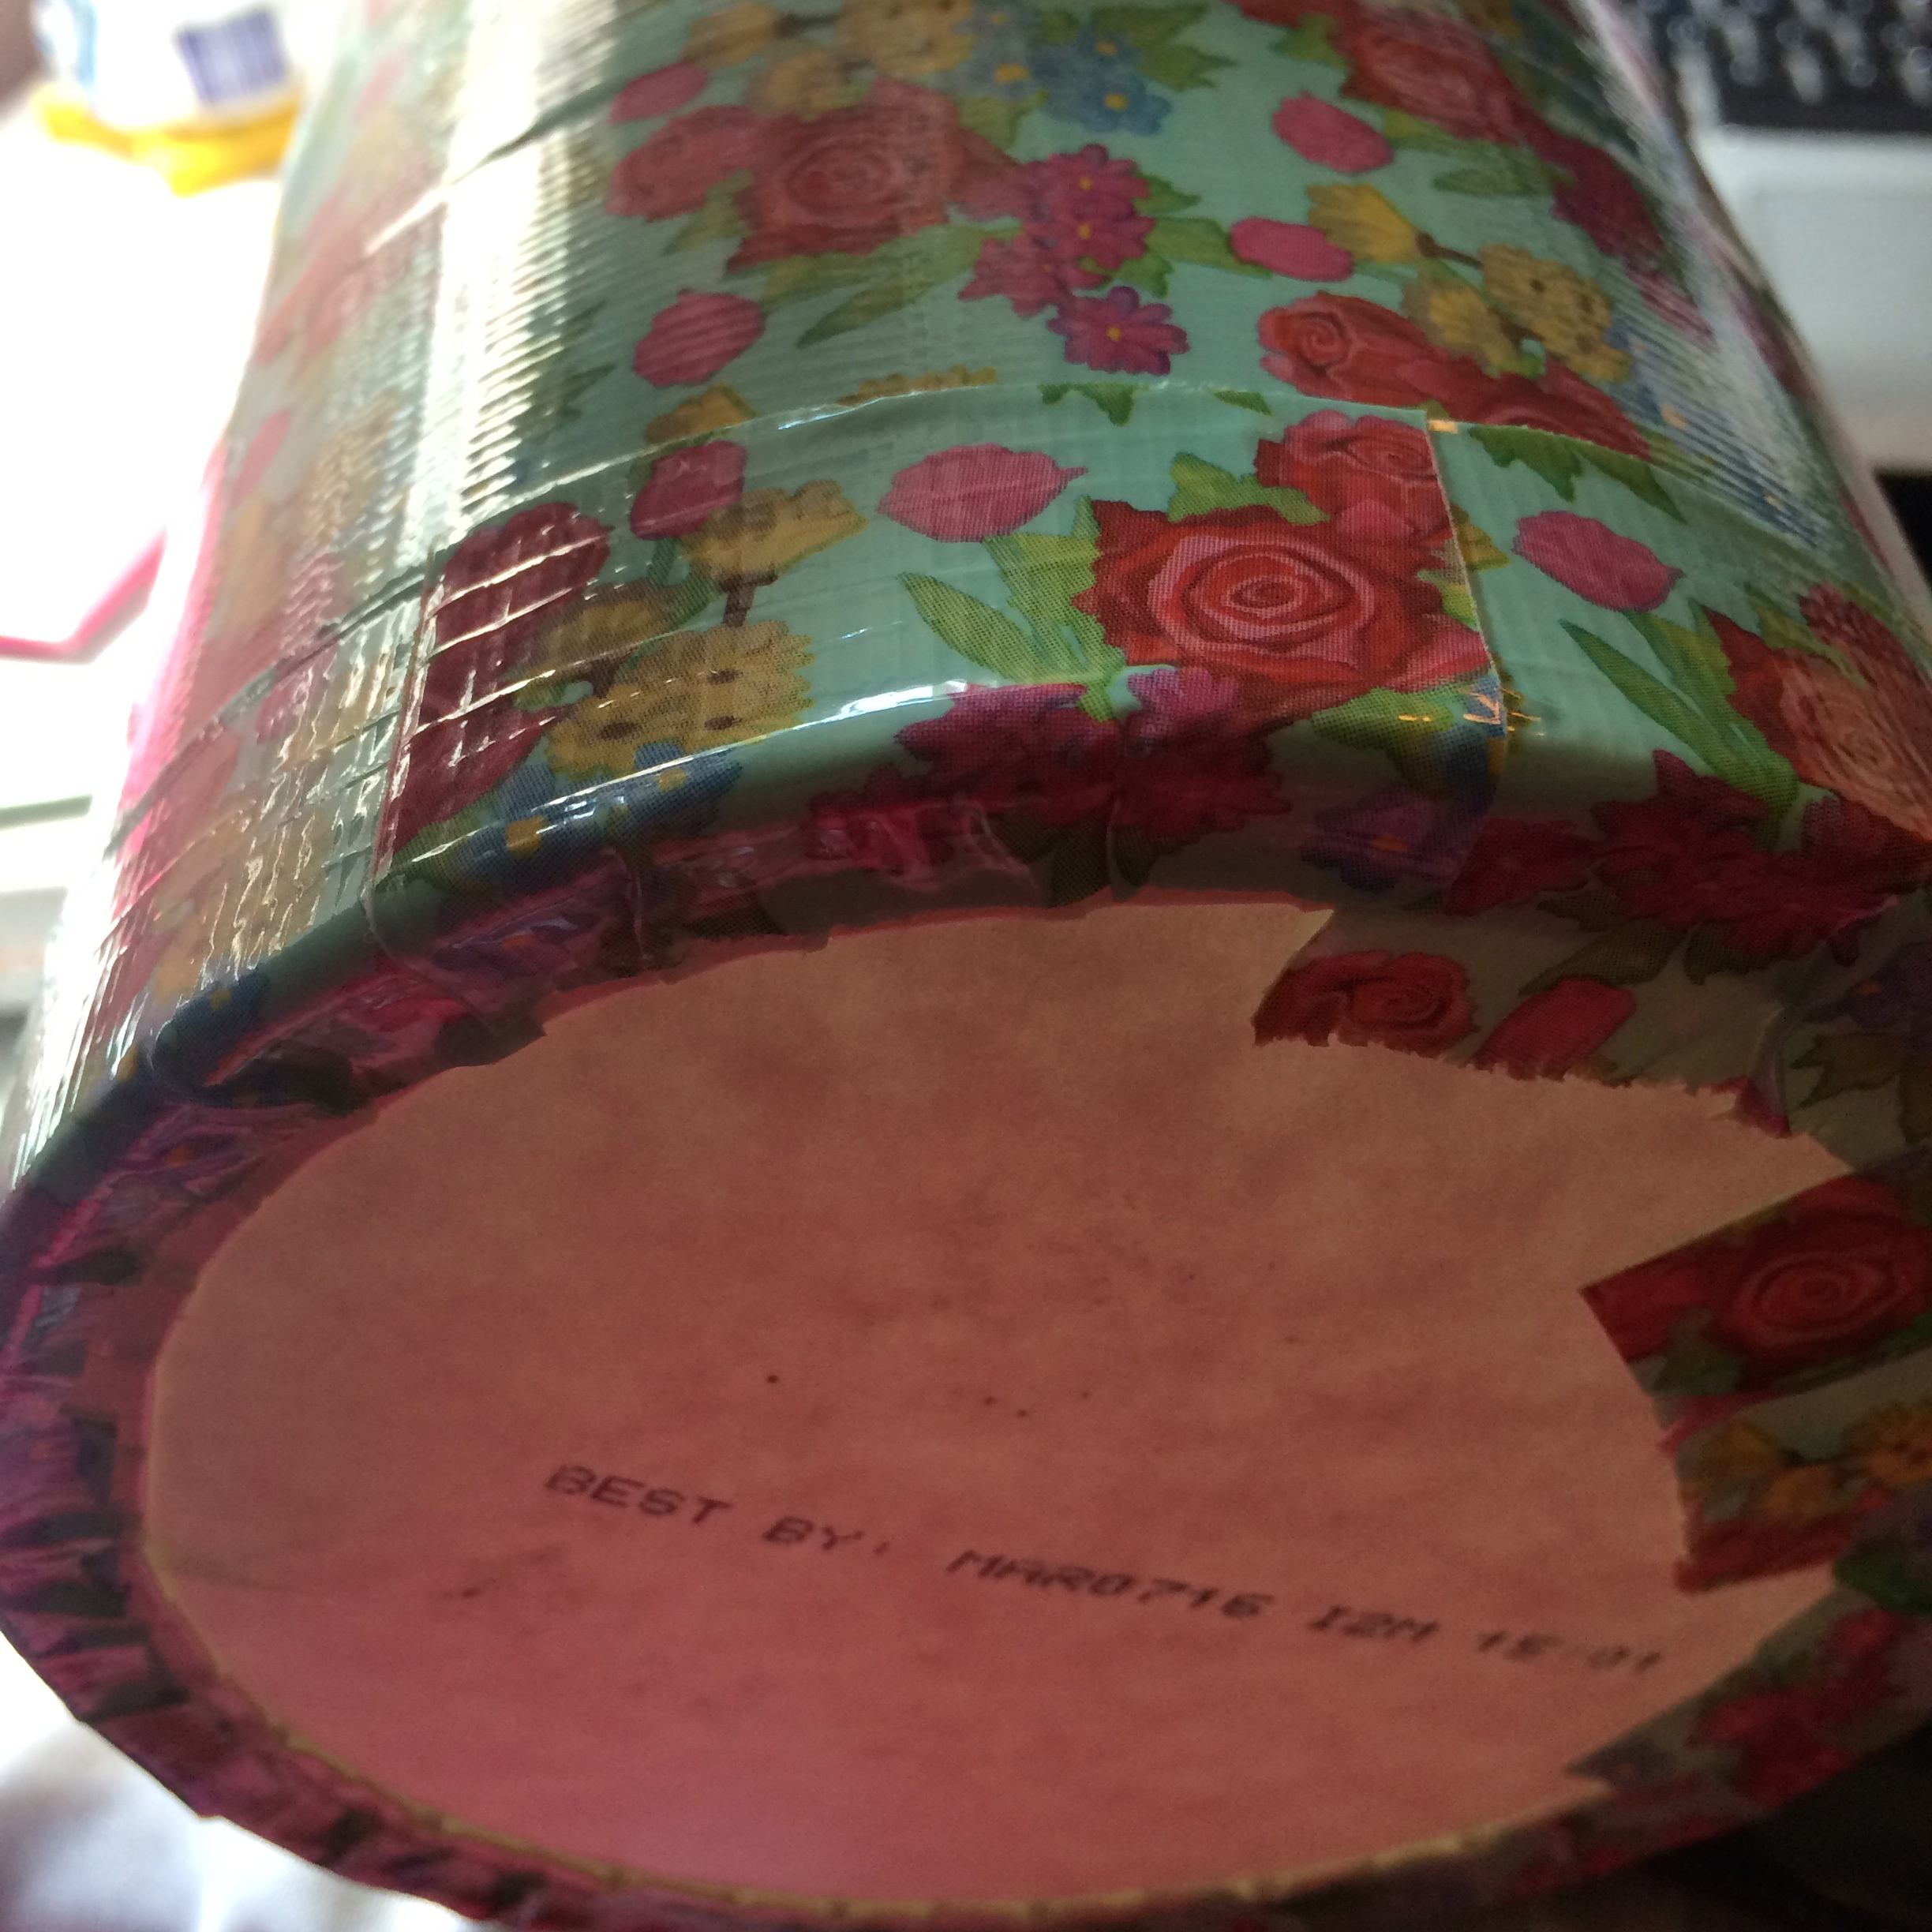
On the last row, I worked in smaller vertical sections to fully cover the base. As you can see it took me a few tries to make all the pieces the same size, but no one will see, so it doesn’t really matter. I covered the overlapping pieces with one last horizontal taping & the container is finished – next up, the lid!
-
- Fully complete
-
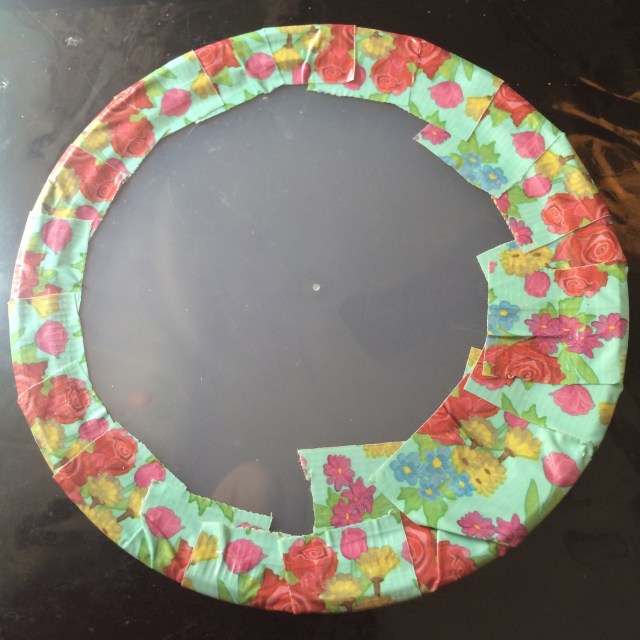
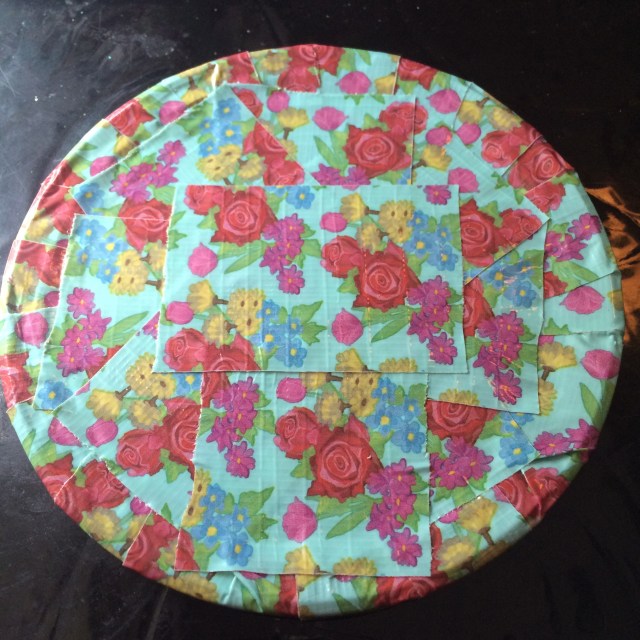
- The edges
I was considering leaving the lid bare, but the plain plastic just looked so odd in comparison to the flowers. I secured a small piece of the tape under the lip of the lid, folded it up, then down onto the top. Again, this took me a few tries to get all the same size, but it doesn’t really matter because you’ll cover it up. I covered any remaining plastic in sort of a patchwork style. I wasn’t too precise with this either because I’m pretty sure I’m going to find something to decorate the top with & mostly cover the tape, but I’m not sure what yet. There you have it – that’s it! I attached a few headbands of different types so you could get an idea of what this Headband Holder can do. I will most likely be making another holder so I can separate stretchy “gym” type headbands from the more standard non stretch type.
Did you enjoy this DIY Craft Tutorial? I think this is so fun & easy! It would also be really simple to spice this DIY up a bit by using E6000 Permanent Craft Adhesive or a hot glue gun and attaching a decoration to the lid, or securing the holder to the center of a cake plate for a fancy base.
Now that I’m thinking about it, you could create this same project, punch small holes down the side, insert pegs, and voila! – you just made a stand to hold multiple pairs of sunglasses. Or cover up a large gum holder like the Mentos containers, and use it to hold bobby pins/hair ties, or just have a fancy gum holder! Hmm…the wheels are turning!
What do you think of any of the ideas I listed above? Will you be trying out this DIY project? Please let me know in the comments below or tag me on Instagram/Twitter: @missal_leigh so I can see your finished product! Click the FOLLOW button on the top right to get an email notification when I write up my next DIY Tutorial – thanks for reading!
